Tuesday, September 29, 2015

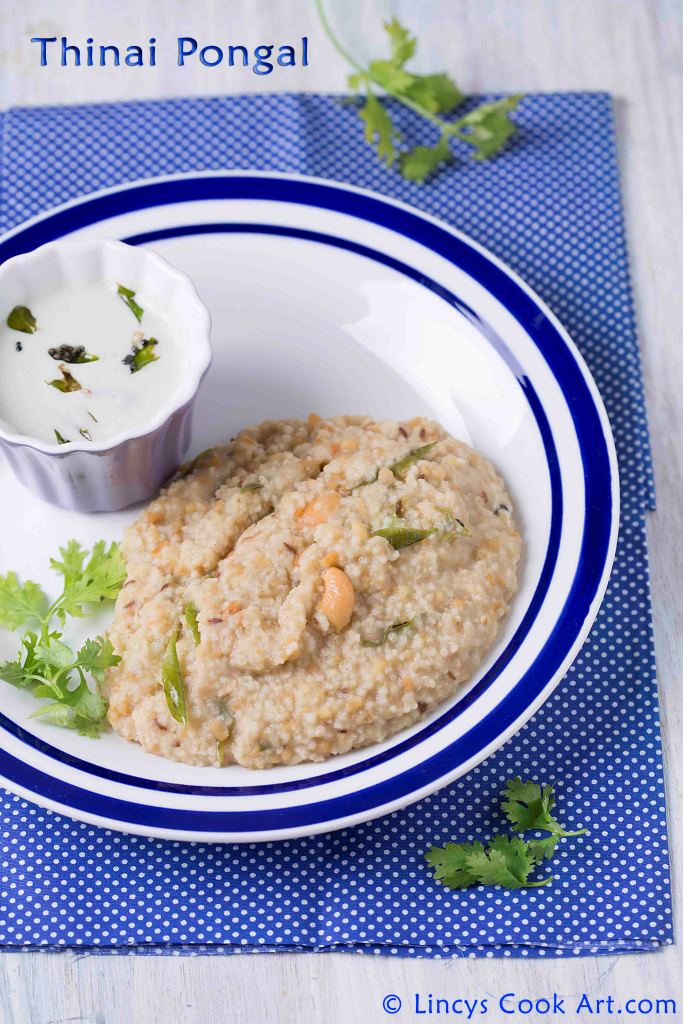
Thinai Ven Pongal| Foxtail millet Pongal is a healthy variation to the traditional pongal made with rice and moong dal. Here rice is replaced with thinai to make this dish healthy. I have shared another Thinai recipe in my blog Thinai Pasiparuppu Payasam which is also an instant & quick to make healthy dessert.
Millets are the best healthy replacement for rice. Nowadays people have become health conscious and consume healthy alternatives like millets. Hope to share more such easy millet recipes when time permits.

Thinai Pongal recipe

Preparation Time:5 minutes
Cooking Time:15 minutes
Cuisine: Tamil
Serves:3-4

INGREDIENTS:
Thinai/ Fox tail millet- 3/4 cup
Moong dal/Pasiparuppu- 1/2 cup
Salt- to taste

To temper:
Oil+ Ghee- 4 teaspoon
Ginger, finely chopped- 1 teaspoon
Cumin/Jeera- 1 teaspoon
Peppercorns- 1 teaspoon
Curry leaves- 2 strand
Cashewnuts, broken- 5

PROCEDURE:
  • Dry roast the moong dal inside the pressure cooker with till light golden colour starts to appear; now switch off the flame.
  • Add thinai with this roasted moong dal and rinse with some water to remove the dirt from dal and thinai.
  • Add 5 cups of water and salt; Close with a lid and pressure cook for about 2 whistles.
  • Heat oil and ghee together in a pan and add chopped ginger, cumin seeds, peppercorns, curry leaves and broken cashews; fry everything till the cashews starts to turn golden.
  • Once the pressure releases open the pressure cooker and add the tempering and mix well and cook for a minute or the moisture would almost evaporate and get to a semi solid consistency.
  • Switch off the flame and serve with any chutney or sambar.

Monday, September 28, 2015

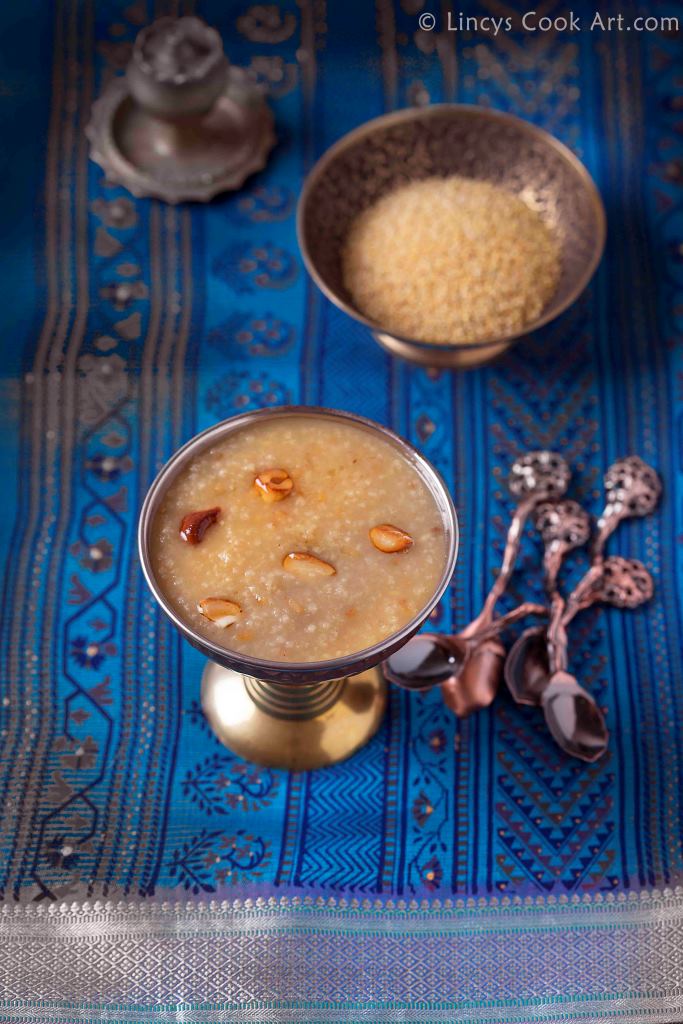
Thinai Payasam| Thinai Paruppu Payasam| Foxtail millet Moong dal Kheer| Millet Payasam is an easy to make healthy version of a normally rich payasam. I love the texture of thinai in this payasam. It feels like sago pearls when you consume the payasam. The taste of this millet payasam was really amazing. I can taste this payasam with out much guilt which I feel while consuming other desserts.

You could make this payasam with out adding moong dal too.I will share that version later. I felt adding moong dal increases the taste of the payasam.

Thinai Pasiparuppu Payasam recipe

Preparation Time: 5 minutes
Cooking Time: 15 minutes
Cuisine: Tamil
Serves:6-8

INGREDIENTS:
Fox tail millet/ Thinai- 1/2 cup
Moong Dal/ Pasiparuppu- 1/2 cup
Jaggery- 1 and 1/4 cups
Milk/ coconut milk- 1 cup
Cardamom powder- 1/2 teaspoon
Ghee- 2 teaspoon
Cashews-10 nos
Raisins- 10 nos
Coconut pieces, chopped-1 tablespoon

PROCEDURE:
  • Dry roast the foxtail millet inside the pressure cooker till nice aroma comes out; set aside. Now roast the moong dal till light golden colour appears.
  • Wash them in water if required and pressure cook with 4 cups of water for about 4 whistles on medium flame.
  • When the pressure releases open the pressure cooker and add the jaggery/ Jaggery syrup(Heat the jaggery in a pan with ¼ cup of water and make syrup and strain to remove impurities) with cardamom powder. Mix them well and cook for 5 mins. 
  • Add the milk and bring it to boil and immediately switch off the flame.
  • In a pan heat ghee and fry the cashewnuts, raisins and coconut together till golden colour.
  • Now add the nuts with ghee into the mixture and mix well, then switch off the stove.
  • Note: You could replace cows milk with coconut milk or you could use 1:1 ratio.
Quinoa Kheer recipe

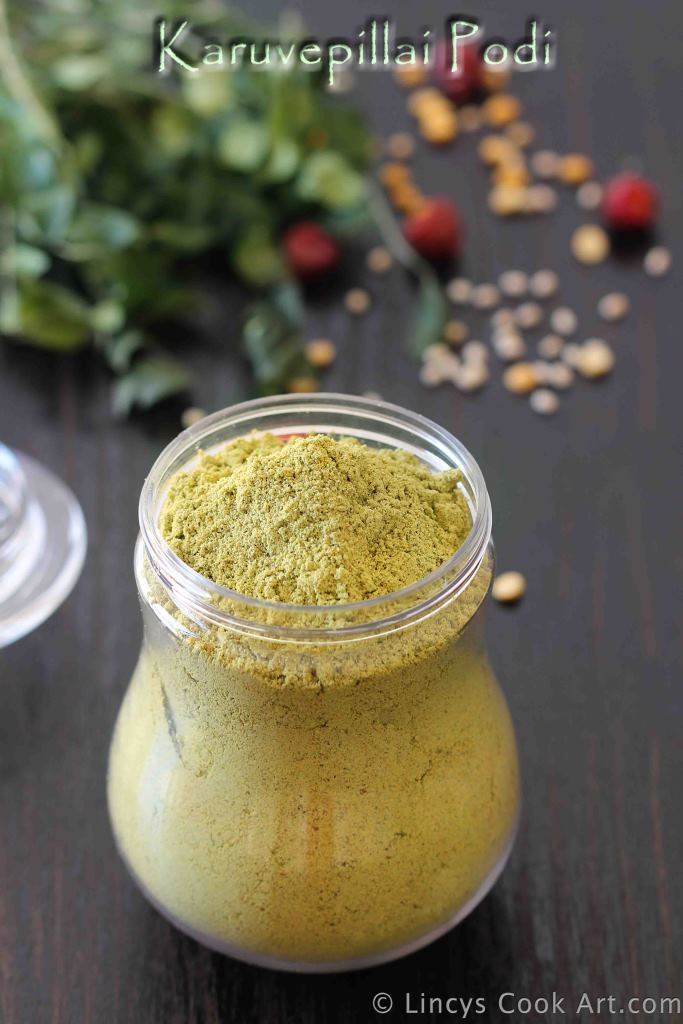
Karuvepillai podi| Curry leaves Chutney powder is an awesome South Indian powder which is used as dip for Idli or dosa. Karuvepillai/ Curry leaves is a flavourful and also a healthy ingredient added in South Indian Cuisine. But we know most of use take the curry leaves out from curries and throw them out when we consume the food.

Tamil Brahmin families normally are experts in this tasty podi which is made at home and is also tasty and has variety of uses. We can make Karuvepillai Kuzhambu, Karuvepillai sadam and also you could use this as a dip for Idli and Dosa. The curry leaves mixed with lentils and chillies gives a great taste . Also makes a instant mix powder for the rice, curry and also for idli dosas.

People those who does not like curry leaves also fall in love with this healthy podi. I am sure you are going to try this podi to make you family healthy and happy!

Curry leaves idli podi recipe

Preparation Time: 10 minutes
Cooking Time: 10 minutes
Cuisine: Tamil
Makes: 1 cup

INGREDIENTS:
Karuvepillai/ Curry leaves- 2 cups, tightly packed
Channa Dal/ kadalai paruppu- 1/2 cups
Urad dhal/ Ulutham paruppu- 1/4 cup
Dry red chillies- 10 nos
Pepper powder- 1 teaspoon
Jeera/ cumin seeds- 1 teaspoon
Tamarind- 1 teaspoon (gooseberry size)
Salt- to taste
Oil- 1 teaspoon

Karuvepillai idli podi recipe

PROCEDURE:
  • Dry the curry leaves in shade for 2-3 days or you can dry roast them on  medium flame in a pan till it reaches crispy and can crumble in your bare hands.
  • If you are roasting, roast separately and allow to cool and add with other ingredients; powder it.
  • Heat oil in and add the dried red chillies, pepper corns, jeera and tamarind.
  • Roast till the dry chillies become crisp.
  • Allow to cool them and add the curry leaves roasted/ dried with them.
  • In a pan dry roast the channa dal, urad dhal separately till it starts to become golden.
  • Transfer all the roasted items and some salt inside a blender jar and make them as a fine powder. 
  • I have powdered the dried red chilli lot with curry leaves first, in which the dried red chilli and the curry leaves are difficult to get powdered. Once they become powder add the channa dal and the urad dhal and powder well.
  • Transfer the powder on a flat plate or paper and allow to cool.
  • Transfer the podi on a air tight container. Refrigerate for longer storage that is more than a month.
  • Take a tablespoon full of karuvepillai podi and make a depression at the centre and pour sesame oil on the depression and mix well and serve with Idlis. 
  • For Podi dosas, Once you spread the dosa batter on tawa sprinkle some oil and sprinkle some karuvepillai podi with hand (or) using pepper salt dispenser and cook the dosas till crisp.
Curry leaves powder recipe

Sunday, September 27, 2015

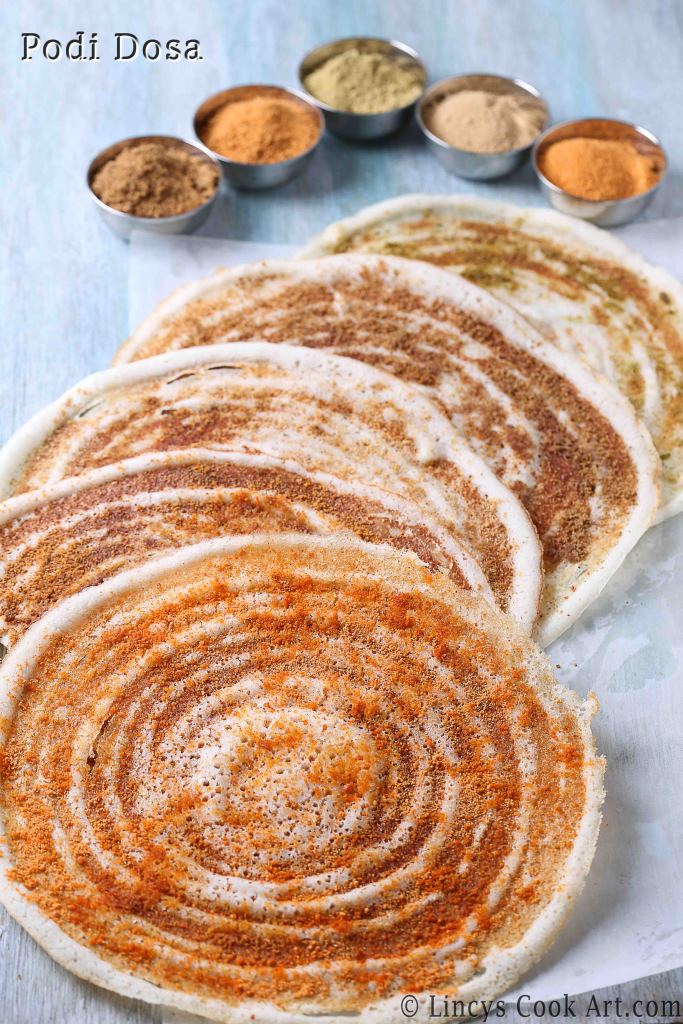
Chana Idli podi Dosa, Curry-leaves podi Dosa, Ellu podi Dosa, Flaxseeds podi DosaKollu podi Dosa : Chutney powder dosa or Podi dosa is an absolute delight and an simple spicy dosa prepared with any idli podi of your choice. I have made this dish with 5 types of podi using the basic Chana Idli podi, Curry leaves powder, Ellu podi, Flaxseeds podi and the Kollu podi. You could make using any desired podi of your choice. You could add some onion or vegetable or even make egg dosa and sprinkle these podis of choice on top. I have shared many Dosa Recipes in blog. Do check my basic Idli Dosa batter recipe.

Dosa with different fillings such as Mysore Masala Dosa, Masala Dosa, Beetroot Masala Dosa, Broccoli Masala Dosa, Pav Bhaji Dosa, Paneer Masala Dosa, Mushroom Masala Dosa, Chicken Masala Dosa, Nutella Banana Dosa, Palak Paneer Dosa, Choco-Nut DosaSpring Roll Dosa and Vegetable Egg Dosa are shared in the preceding links.

The plain dosa recipes are as follows Curry leaves Dosa, Spinach Dosa, Beetroot dosa, Pumpkin Dosa, Tomato Dosa,Cucumber dosa, Onion rava dosa, Neer Dosa, Soyabean dosa, and Tricolour dosa.

Uttappam varieties includes Uttappam platter, Dosa Pizza..etc

Dosa with idli podi

INGREDIENTS:
Dosa Batter- 1 big ladle/ dosa
Oil- 1/2 teaspoon/dosa
Podi of Choice- Chana Idli podi, Curry leaves powder, Ellu podi, Flaxseeds podi, Kollu podi..etc- 1 tablespoon/dosa

Podi dosa recipe

PROCEDURE:
  • Heat the dosa tawa and grease the pan with little oil and spread the dosa in concentric circles. You could make uttapam and follow the same procedure.
  • Spread the podi of choice evenly over the dosa using hand. You could add some chopped onion  or veggies of your choice or even egg and sprinkle the podi on top of it.
  • Drizzle little oil and allow to cook till the dosa becomes crisp and golden.
  • This dosa does not require any side dish ,but you could serve with chutney or sambar of your choice.
Podi dosa recipe

Flax seed podi dosa, ellu podi dosa, karuvepillai podi dosa, Kollu podi dosa, idli podi dosa

Flax seed podi dosa, ellu podi dosa, karuvepillai podi dosa, Kollu podi dosa, idli podi dosa

Thursday, September 24, 2015

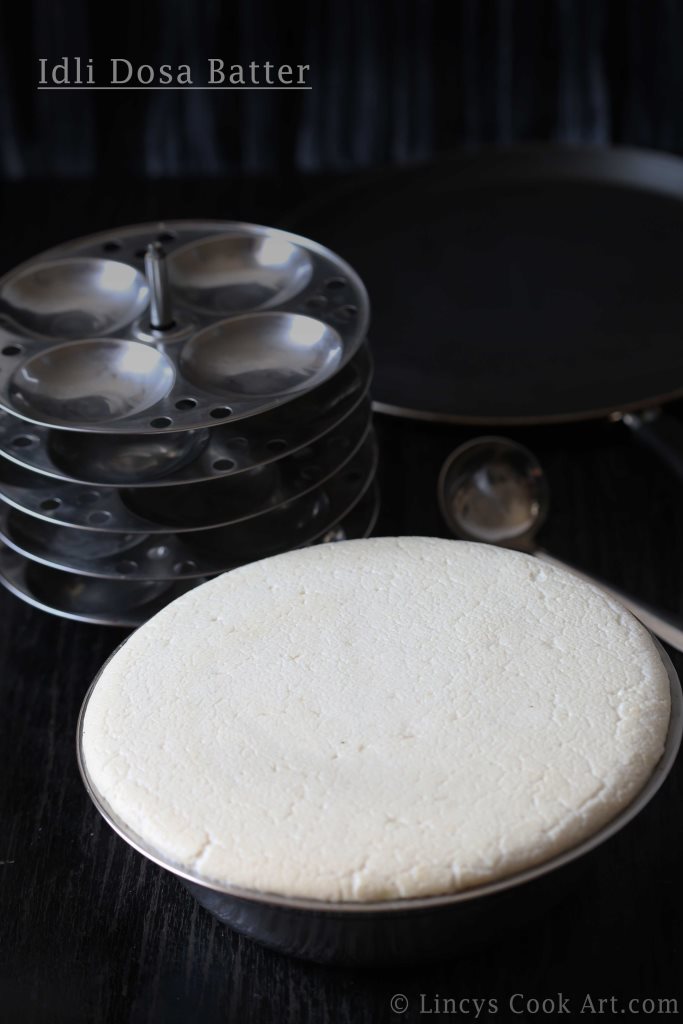
Making soft Idlis and crispy Dosa is essential for any South Indian woman as it is a breakfast/dinner found in almost at all homes at least twice or thrice a week. Idlis are known to be an healthy food as it is a steamed food. Idlis & dosas are a comfort food for every South Indian.

There is no big secret behind the preparation of this batter, just some care should be taken in a prim manner to get a nice batter. This proportion I am using around 6 years old post marriage. Here i will give some tips to make this batter to make a fool proof batter.

Idli Dosa Batter Recipe

Preparation Time: 30 minutes+ Soaking time+ Fermenting time
Cooking Time: 5-10 minutes
Cuisine: Tamil
Makes- around 4 litres

INGREDIENTS:
Basic Idli Dosa Batter:
 Idli Rice (half parboiled)/ Raw Rice- 4 cups
Whole Urad dhal-1 cup
Fenugreek seeds/ methi- 1teaspoon
Salt- to taste(1 teaspoon/litre approximately)
Water- as required
* You could use 2 cups of any Raw rice/ Idli rice and 2 cups of Boiled rice together for a cup of urad dhal.

For Dosa: Add just before making dosa.
Sugar- 1/2 teaspoon/litre batter approximately

How to make soft idlis and crispy dosas

PROCEDURE:
  • Wash the rice and urad dhal well atleast five times or more till you get clear water.
  • Add fenugreek/methi seeds with rice or urad dal; Soak the rice in a deep bowl by covering with enough water for them to submerge.
  • Add the urad dhal in a separate bowl with more water to submerge as urad dhal takes more water and increases in volume while soaking.
  • Allow both to soak for 2 hours. Drain the water from urad dhal and rice; set aside.
  • In a wet grinder grind the rice first for 5 minutes and then add water occasionally little by little to get a coarsely ground paste. You could use the soaked water or fresh water for grinding. When you touch the rice with hand you should feel the grainy texture like rice rava found in the batter for the right consistency.
  • Transfer the batter into the deep mixing bowl and set aside.
  • Now add the soaked urad dhal into the grinder and make a very smooth fluffy paste by adding water in between.
  • Transfer the urad paste over the rice paste.
  • Now clean the wet grinder with a cup of water and reserve the water.
  • Now add some salt to taste and mix both the paste well with hand in circular motion either clockwise or anti clockwise to incorporate air into the batter. Add the reserved water and mix well to make thick batter. Batter should not be too thick as it takes more time to ferment.
  • Keep the batter closed with a loose lid and ferment for overnight or around 8-10 hours. Fermenting time varies with climatic conditions summer it takes less time to ferment and winter takes more time to ferment. 
  • The size of the vessel is more important it should have some extra space to accommodate while the batter rises and some space to avoid spillage while mixing.
  • Once the batter increase in volume showing risen top forms a puffed up appearance indicates the batter is ready.
  • Using a ladle beat the dosa batter well to make uniformly mixed batter. Once you mix the batter the consistency should be really fluffy; set aside.
  • To store the batter keep it inside the fridge with a tight lid and store for a week.
Idli:
  • Take the batter and dilute with little bit of water if the batter is too thick. The consistency of the batter should not be watery. 
  • Heat water in  idli steamer till rolling hot. 
  • While it is boiling, dip your fingers in oil and grease the idli plates.
  • Fill the plates with idli batter and arrange the plates on stand and transfer it on the steamer and close with a lid and steam for 5-10 minutes on medium high flame.
  • Check if done by inserting a skewer or knife at the centre. It should come clear.
  • If you feel the stickiness close with the lid and steam it for further 2 minutes.
  • Once it is done remove the plates and allow to cool for 5- 10 minutes.
  • You could sprinkle little water on top of the idlis as it makes the idlis easily come off from the idli plates.
  • Remove the idlis using a spoon and keep inside a hot box.
  • Serve with Chutney/ Sambar/ Podi.
Dosa:
  • Add half a teaspoon of sugar for approximately a litre of batter; add little water to dilute the batter and mix well before you make dosas as you require little loose batter for making dosas. The consistency of the batter should be bit runny than the idli batter.
  • Sugar makes your dosa to get a deep golden colour.
  • Grease the dosa tawa initially with oil and allow to heat well before make dosas.
  • Now start preparing dosas by adding big ladle full of batter over the hot tawa and spread with the backside of the ladle into concentric circles.
  • Drizzle little oil on top and cook the dosas till crispy.
  • If you make thick dosa flip the dosa and cook the other side too.
  • Check this link for the different Dosa Varieties which could be made with this batter.
Tips:
  • I used to make idlis for 3 days after grinding the batter and dosa from the very first day to 7 days. I do not store the batter more than that given period of time.
  • You could grind and store the idli dosa batter in fridge if you do not have enough time to ferment. When you get time give extra time for thawing and allow to ferment the batter.
  • You could divide the batter into two lots and ferment once the first lot finishes. One of my friend does like this.
  • I used to avoid salt while mixing if I decide to store the batter for a week long without change in taste (sourness) in the batter. It takes extra 1 hour for fermenting. When i need i used to remove the required quantity and add salt to make idli/ dosa.
  • People even say that you could freeze the batter immediately after fermenting the batter and thaw properly and use it upto a month. But i have not tried as i am not that lazy. ;-)
  • Always bring the batter to room  temperature before making Idli dosa.
  • You could use a blender jar to make this batter but the batter the tends to get to heated up while grinding so grind little quantity at a time and pour some ice water if possible to balance the generated heat. Will post how to make idli dosa batter perfect in blender jar as a separate post.
  • In cold counties like the US or the UK, it should take more than 12-16 hours to ferment. So if you are caught up anywhere there, try keeping it in a conventional oven or any warm place.
  • Heat of the pan is very important to make crispy dosas. If the pan over heated reduce the flame and then start making dosas. I used to reduce the flame totally once i remove the dosa from pan till i spread the next dosa. Only for cooking i used to keep the flame to medium.
  • If the dosa sticks to the pan use cut onion and rub the pan to prevent sticking.
Idli Dosa Maavu recipe

Monday, September 21, 2015

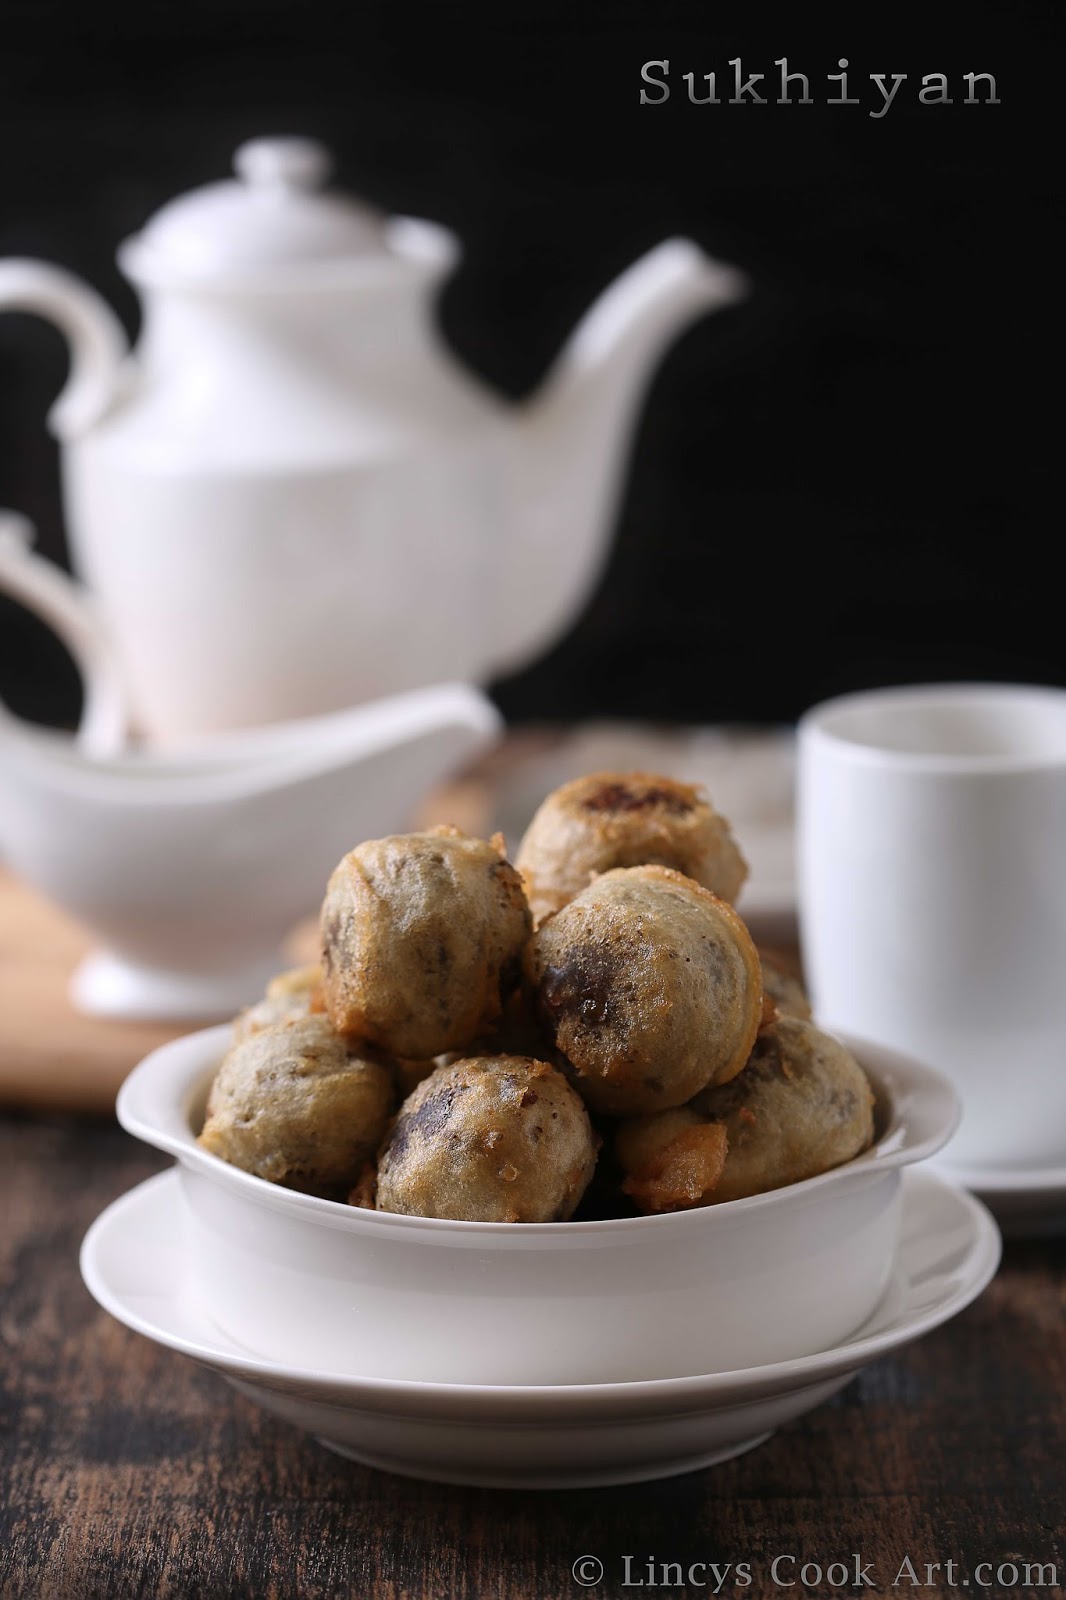
Sukhiyan| Sugian|Suyyam is a unique Kerala special teatime snack. Also found in some southern parts of Tamil Nadu too. It is an easy to make tea time snack generally availableat roadside small tea shops, railway stations..etc. It is also otherwise known as Mothagamor Sweet Bonda too in some parts.  It is a popular Chayakada Palaharam.

This sukhiyan is usually prepared with whole green moong or chana dhal filling. If you prefer using chana dal filling refer here for the filling. Sweetened dal filling flavoured with cardamom and covered in a subtle crunchy covering. It is one of my childhood favourites.

Sukhiyan recipe

INGREDIENTS:
Green Gram| Whole moong| Cheru payaru- 1 cup
Jaggery- 1/2 -3/4 cup
Coconut- 2 tablespoons(optional)
Cardamom powder- 1/4 teaspoon

Outer covering batter:
All purpose flour| maida- 1/2 cup
Corn flour- 2 tablespoons
Sugar- pinch
Salt- to taste

Sugiyan recipe

PROCEDURE:
  • Soak the whole moong for minimum 6 hours or overnight.
  • Pressure cook for 2 whistles. It should not become mushy but it has to be cooked soft.
  • Drain the cooked water if any from the cooked moong.
  • In a pan add the jaggery and 1/4 cup of water and melt the jaggery.
  • Once it starts to bubble, add the cooked whole moong, coconut and cardamom. Mix well and cook till the moisture almost evaporates from the mixture.
  • Now switch off the flame and allow the mixture to become cool. When the mixture is warm start rolling the moong in to small lemon sized 10-12 balls; set aside.
  • In a deep bowl add the all purpose flour, corn flour, sugar and salt and mix well.
  • Pour some water little by little, till you get the dosa batter like consistency with out any lumps.
  • Heat some oil in a deep pan.
  • Now drop one of the moong ball using your hand or spoon in side the batter and allow to coat the batter all over the ball.
  •  Drop the ball in the hot oil and fry both the sides till you get golden coloured balls.
  • Note: You could use normal dosa batter instead of all maida batter for making this sukhiyan.
  • Refer here if you like to use chana dal filling.
  • You could add 1/4 teaspoon of turmeric if you wish in the batter.

Susiyam recipe

Sugiyan recipe

Wednesday, September 16, 2015

Khajur Modak| Dates and nuts modak is a modak made of dry fruits and nuts. It is an easy to make sugar free version of modak recipe. It is absolutely rich and tasty sweet, which you could make this modak with the rice flour outer shell or without. I loved the one with shell while my hubby liked the one with out the shell. It tastes really delicious with the freshly roasted nuts with a hint of the cardamom flavour.

It is a healthy and rich in nutrients. Festivals adds lots of calories in the form of sugar or jaggery. You could prepare this modak at this festive season and stay healthy.

Dates and nuts modak

INGREDIENTS:
Dates, de-seeded- 30 nos (1 cup with out seeds)
Nuts of choice (I had used almonds, cashews and pista)- 1/2 cup
Cardamom powder- big pinch
Ghee/ Butter- 1 tablespoon

Dates and nuts modak

PROCEDURE:
  • Toast the nuts in half a teaspoon of ghee and allow it to cool.
  • Now transfer the nuts inside a mortar and pestle or blender jar; allow it to be ground coarsely as a powder.
  • Add this inside a bowl and set aside.
  • Remove the seeds from the dates. Add this inside a blender jar and grind to make a paste. 
  • Add the dates paste inside the bowl with crushed nuts.
  • Add the cardamom powder and mix well.
  • You could add some desiccated coconut or poppy seeds if you wish to add at this stage. This adds volume and balances the sweetness.
  • Grease your hands and fill the moulds or shape it with hand, first make a ball and the shape it like modak.
  • De mould carefully and keep on top of a greased plate.
  • I have divided the dates mixture into two equal haves and one half without the rice flour shell and made the other half with the rice flour shell.
  • Check the link to make the procedure for the rice flour shell i have made with half a cup of rice flour and filled with the dates and nuts filling and steamed for 10 minutes.

Khajoor Modak recipe

Monday, September 14, 2015

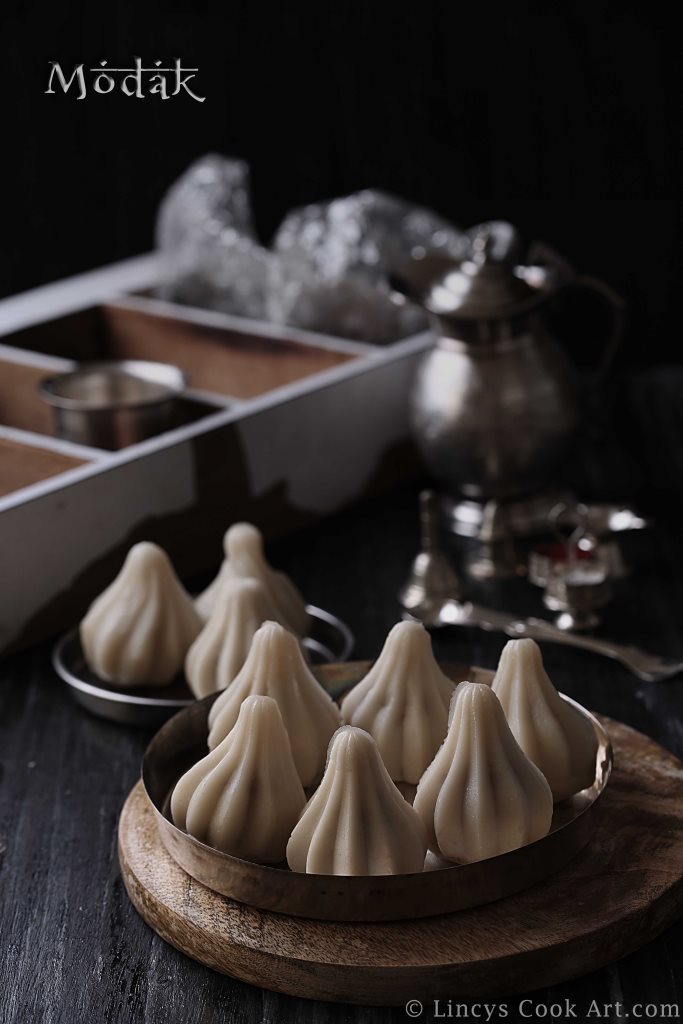
Modak| Modagam| Coconut poorna kozhukattai is a traditional sweet dumpling made for the Vinayaka Chaturthi. I love the coconut jaggery filled dumpling scented with cadamom. I could eat a filling cup just like that. This coconut jaggery filling is commonly used for Ganesh chaturthi.
Nowadays many versions of kozhukattai exists but i could say this version is indeed the king of all kozhukattais. North Indians add some poppy seeds in the stuffing but make it in a same way. Simple yet delicious snack or dessert item perfect for festival seasons!!!

Mothagam recipe

Preparation Time: 15 minutes
Cooking Time: 15+ 10 minutes
Cuisine: Indian
Serves:7-8nos

INGREDIENTS: 
Rice flour| Roasted rice flour| Idiyappam flour- 1 cup
Salt- to taste
Oil- 1 teaspoon
Water- 1and 1/4 cup

For the stuffing:
Jaggery, grated- 3/4 cup
Coconut, grated- 1 and 1/2 cups
Cardamom- 1/4 teaspoon

Thengai mothagam recipe

PROCEDURE:
For the stuffing:
  • In a pan add the jaggery with 1/4 cup of water and melt well to make a syrup. Strain the syrup if it has impurities.
  • Once the jaggery syrup bubbles add the grated coconut and cardamom powder. North Indians add two teaspoon of poppy seeds(khus khus) with this. Add if you wish to.
  • Cook on medium flame till the moisture from the mixture almost totally evaporates. If you touch the mixture it starts to stick in your hands. At this stage switch off the flame and allow to cool.
  • Start to roll the coconut mixture into small balls when the mixture is slightly warm; set aside.
For the rice flour shell:
  • If you use normal (not roasted) rice flour add the flour inside the boiling hot water and cook the flour with out lumps by constant stirring and make the dough.
  • If you use roasted rice flour| Idiyappam flour, add the rice flour, salt and oil inside a bowl. Heat water in a pan to a rolling hot stage.
  • Now pour the hot water over the rice flour and mix with a spoon. Stop adding when the rice flour reaches a soft dough stage. Knead to make a  soft dough.
  • Rest for few minutes to cool the dough with a lid. When the dough is warm you can start preparing the kozhukattai.
  • Divide the dough into lemon sized balls;set aside.
Kozhukattai/ Modak:(modak without mould refer here for step-wise pics)
  • Take a rice flour ball and roll inside the palm and flatten the ball; dip the finger inside water and spread to make a thin sheet as much as possible. 
  • Keep the stuffing inside and gather the edges by lightly pulling the dough; seal the edges tightly.
Mould method:
  • Grease the mould with little oil.
  • Take the rice flour dough (ball) and press into the cavity of the modak till it is evenly lined on all the sides.
  • Fill the dough cavity with the stuffing and press well with out any gap. You could divide the filling ball into two and fill the cavity to prevent gaps inside.
  • Take a smaller portion of the dough and spread it evenly at the base of the modak mould so as to seal the filling.
  • Demould the modak from the modak mould.
Steaming| cooking:
  • Grease a idli stand or any stemer vessel and arrange the kozhukattai on top.
  • Heat water in a steamer vessel or idli steamer once the water becomes rolling hot keep the idli stand inside the hot water and allow to steam for 10 minutes till the outside rice flour dough becomes shiny.
Vinayaka Chaturthi recipes


Coconut jaggery sweet dumplings

How to make modak recipe


Like us on Facebook

Biryani and Pulao Recipes

25+ Dosa Recipes

Translate

Instagram
my foodgawker gallery
myTaste.in Tasty Query - recipes search engine

Food Categories